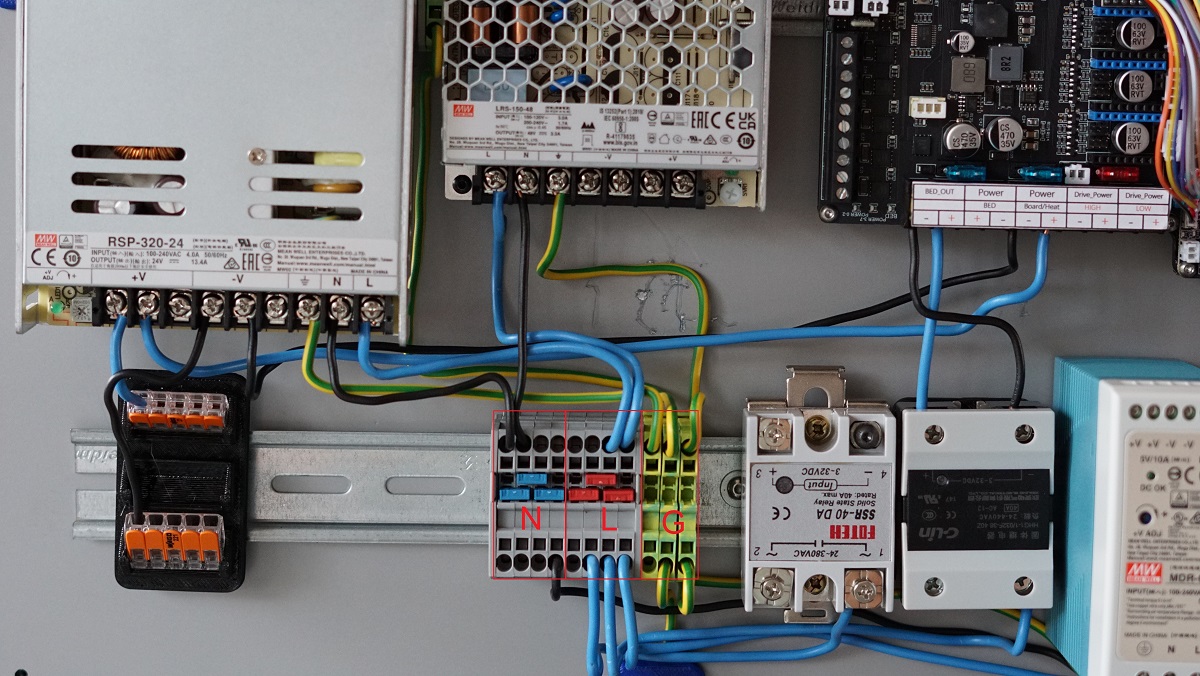
Hooking up the AC side
Here you see my AC setup using the Distribution blocks. the Yellow/Green is Ground. Blue is live and Black is my Neutral side.
It’s very important to Properly ground everything. The Distrubution blocks i used for Ground have a passage to the DIN rail so those are automatically also grounded once a block is put on them. You can see i also grounded the top DIN rail and the Wire on the bottom middle slot is connected to the bolt holding my backpanel to the frame. This way the entire frame is also grounded. It’s also important to run a ground wire from our bed to our distribution block or Wago so that the bed is properly grounded. We are after all running AC through the bed and don’t wanna shock ourselves.
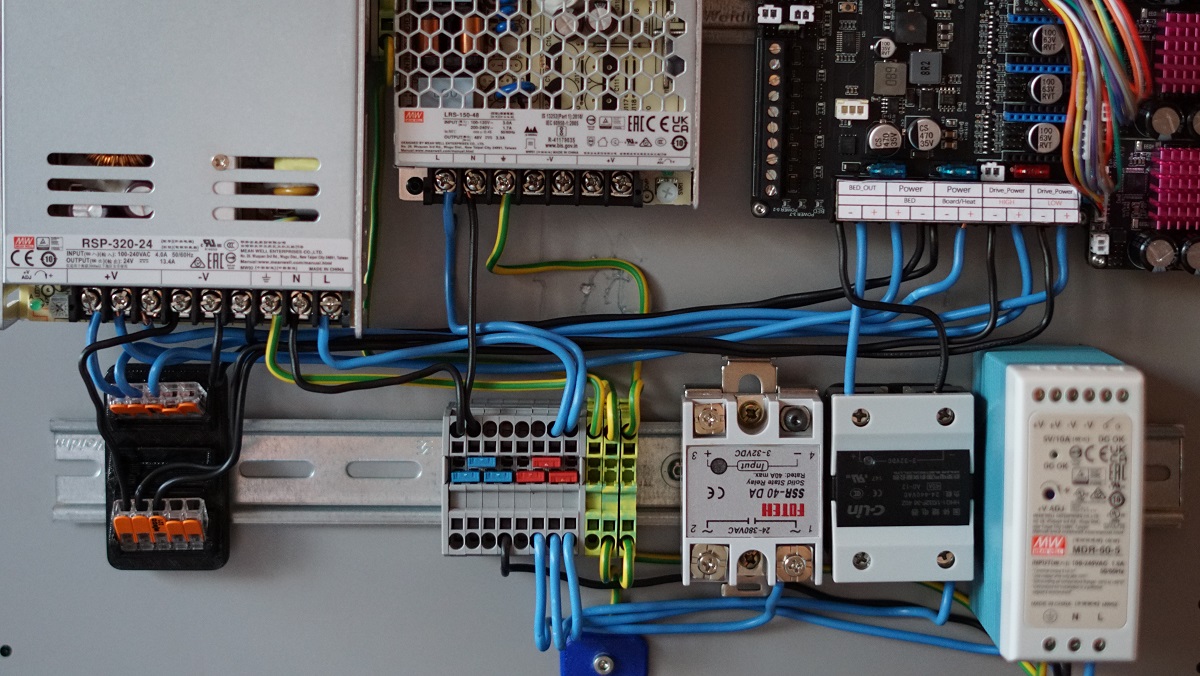
The Live side Blue get’s distributed to the L inputs on the PSU’s and too 1 input of the AC side of the SSR’s. You can see i used the right screw terminal for both SSR’s.
The Neutral side get’s connected to the N on our PSU’s.
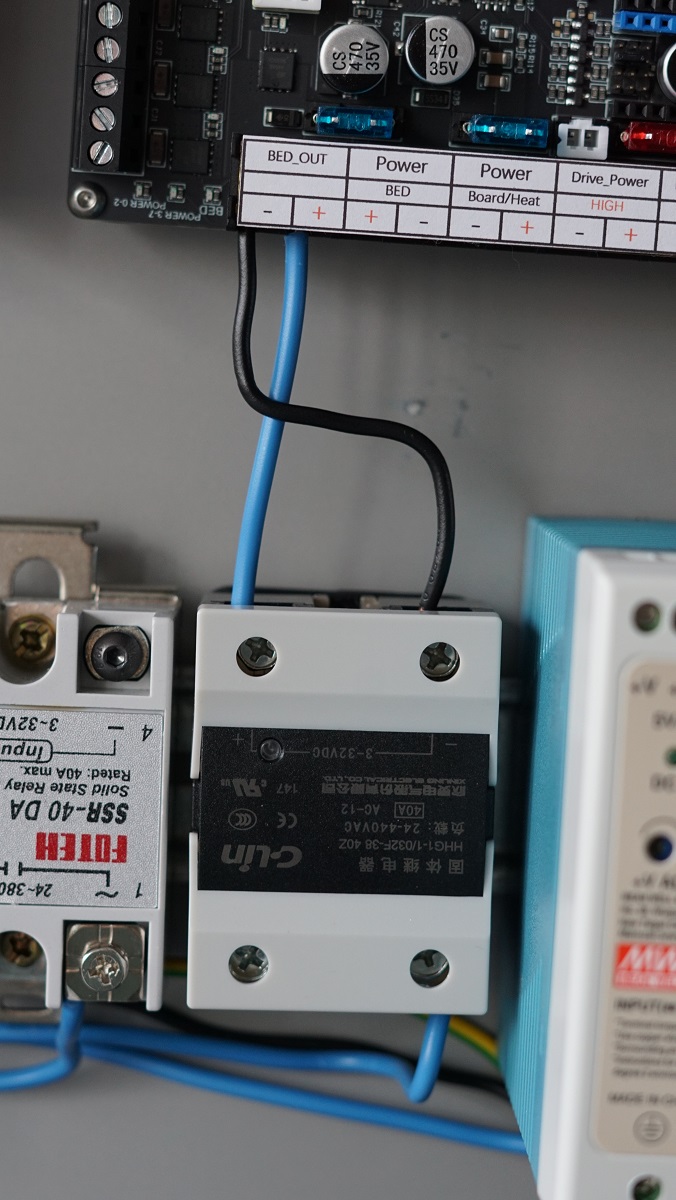
Bed heater SSR
Now it’s time to hookup the SSR for the Bed heater.
Check your SSR to see where the + and - is for your DC side and hook that up to your Board like shown Bellow.
The SSR will also get a AC line put in on the other side. like shown Bellow. that’s your Live AC line to power to the bed. I used the right terminal for the input here. the Left terminal goes to your Bed heater and then the other wire coming back from the Bed heater get’s plugged into your Neutral distribution block for your AC marked with N in the picture above.
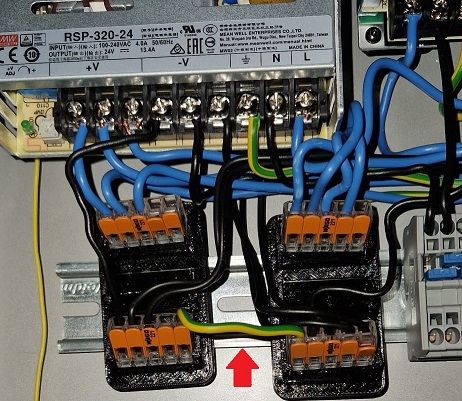
Plugging in the 24V side
• Your Motherboard only get’s 24V this is the beauty of the External 5160’s you don’t need to run 48V to your motherboard lowering the risk of damaging your motherboard when you have a issue with your 5160’s.
Here you can see the first Wago blocks i used for my 24V + and - the PSU has a wire from the +V to the top Wago and -V has a wire running to the Bottom Wago block. This way you can have more outputs for your PSU.
Plugging in our 48V side
Next up is our 48V lines.
If using Wago’s you run a +V line to the top Wago and a -V to the Bottom Wago. From there we can start distributing it to our 5160’s.

Plug in a Wire to the +V side of the wago and run it to your 5160. Put it in the Bottom slot like shown in the picture below.
Plug in a wire to the -V side of the Wago and run it to your 5160. Put it in the second slot of the 5160 like shown below.

Now do this for all your 5160’s like you see down below. That’s all the wiring you have to do for 48V.

One last IMPORTANT step to do is to link your 24V - to your 48V -. Like you see Below i used a piece of wire to connect my 24V Negative Wago to my 48V Negative Wago.
If you forget this step you can have issue’s with your 5160’s once we try to start using them.